


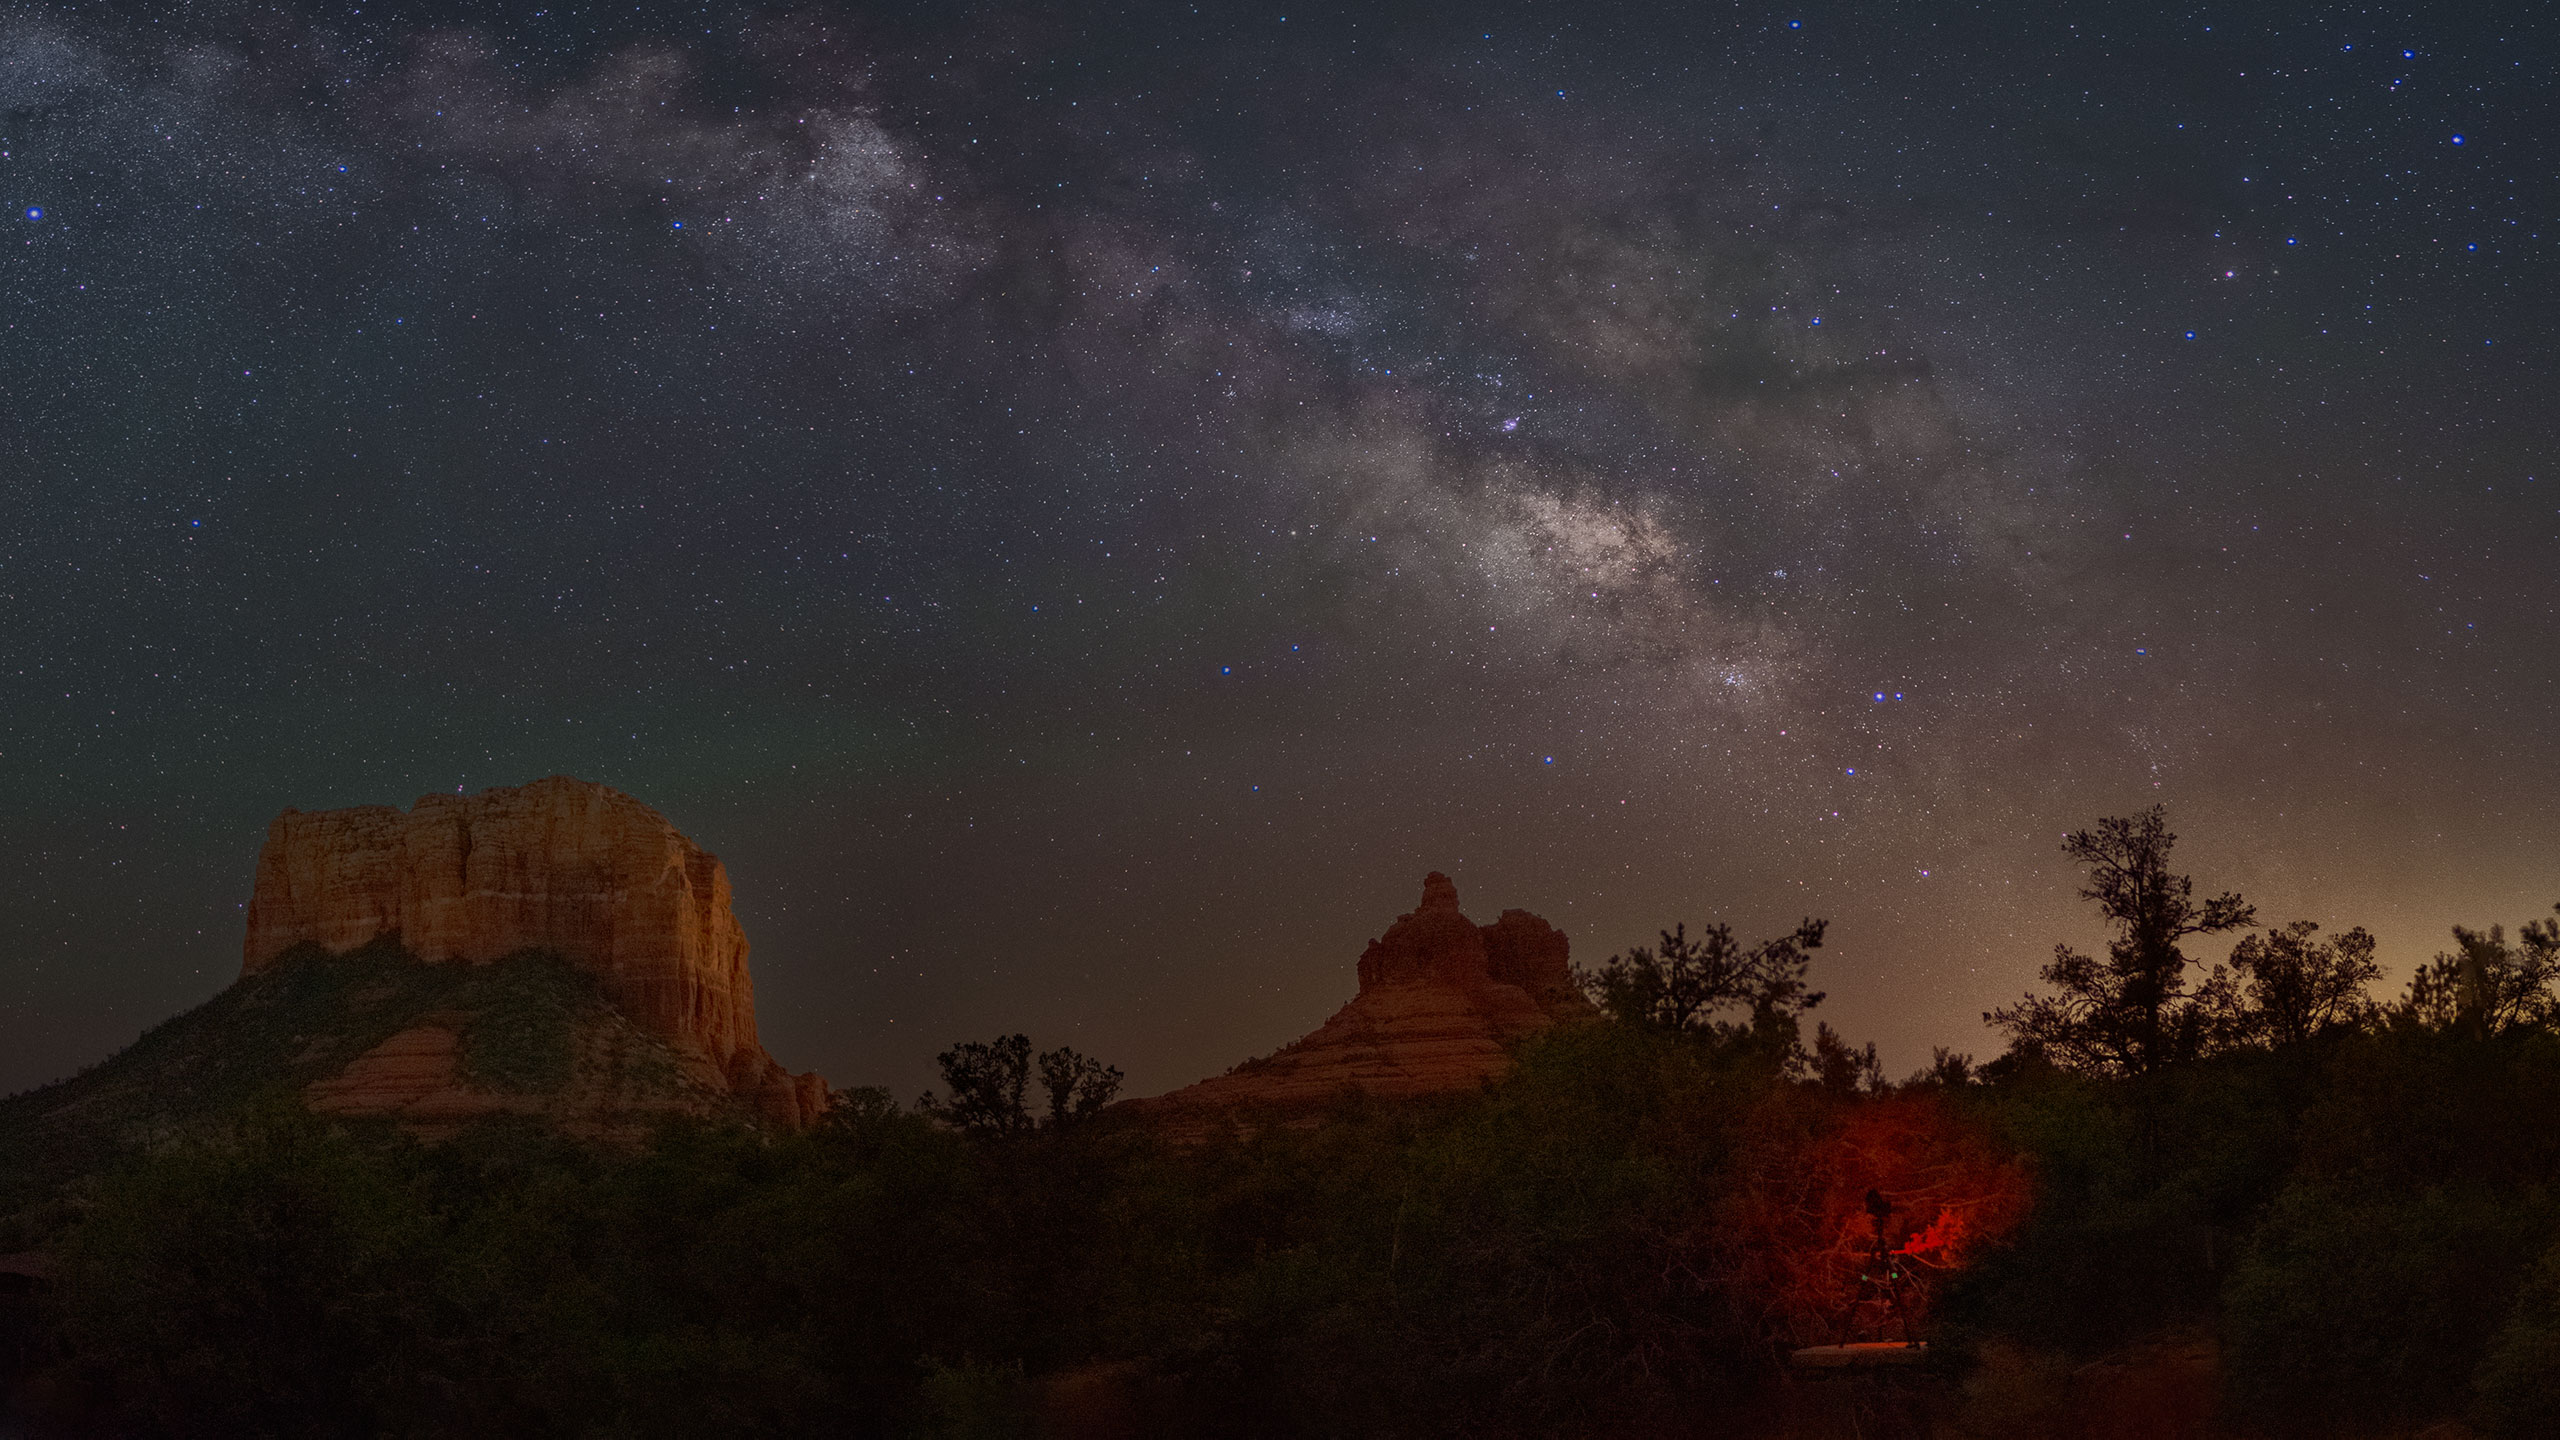
If you want to multiply your use of skills and test yourself, work on Milky Way panorama photography.
Photographing and stitching a simple landscape panorama has challenges. A single Milky Way image has a different set of challenges. When you work to do both at the same time, that’s what I call fun! Here are some ways to make the project a bit easier.
Panoramic gear can be helpful
Using the proper equipment can make the overall experience much easier. For example, using a panorama head makes it easier to move the “light entry point” of the lens over the pivot point of your camera support. Doing this makes it easier for your software to properly stitch your panorama. If your are making multiple passes, one for foreground and another for stars a click stop device makes blending the two stitches together much easier. This is also true if you need to capture a second row for a high arch. Here’s an article on how to learn exactly where your light entry point is on your lens.
Camera gear
While it is not absolutely necessary to have fast glass it becomes much easier to catch enough light quickly. Wide angle lenses that are f/2.8 or below work best. When you are making the images for the Milky Way you’ll need to work quickly. For the pano accompanying this article I was working with a 12mm f/1.4 Summilux Leica lens on my OM 1 camera. Note I am working with a micro 4/3rds format which has an equivalent field of view as a 24mm full frame camera. A very handy feature of the OM system, and some older Olympus cameras, is Starry Sky Autofocus. A single push of the shutter button focuses upon the stars. A green light and you are good to go without a lot of fussing and work to attain focus.
Capture
If you are working in the dark, which is what allows the Milky Way to be very visible, you’ll have to work extra to make your foreground show detail. I recommend taking longer exposures at higher ISO multiple times. I usually do about 10 frames.
For the stars you’ll need to capture multiple images as well but the exposure will need to be much shorter than you can use for the foreground. Again, I am capturing each slice of the image 10 times. This helps the camera capture more detail in the nebulous areas of the Galactic Center of the Milky Way.


Note that when photographing a horizontal panorama you will want to have the camera in a vertical orientation. Vertical orientation makes for more real estate when processing your images.
Processing
Take those frames into your preferred processing program for initial exposure and color work. Follow that by stacking your images in layers in a single file in Photoshop. Select all the layers and turn into a Smart Object. In the layers menu navigate to Smart Object > Filters > Median Filter. This help you control the noise created by using high ISO. Here’s a more in-depth article on using the Median Filter.


While you could process your star images in Photoshop, there is specialty software that makes this MUCH easier. For the Mac computers I recommend Starry Landscape Stacker which sells for about $60. PC user have a free software called Sequator. These programs will help you align the stars which apparently move during capture due to the Earth’s rotation. Multiple images are needed to allow the software to remove most noise as it processes. Article here on Starry Landscape Stacker
Blend
Foreground and star image panoramas need to be exposed for different amounts of time. They will need to be processed into individual panoramas and blended together in Photoshop using masks and layers.

Have a great time under the night skies! Come to Sedona for my Milky Way and Night Sky Photo Workshops. Or if you would prefer You can hire me for your specific needs for one on one coaching. One of my students said, “I would highly recommend Bob Coates as an instructor. He is extremely knowledgeable, patient, and well-organized. His class was incredible. I’m already planning when I can take another one!” – Anne-Marie Shumate, M. Photog. CPP – Past President Arizona Professional Photographers Association Photographer/Owner, Lasting Images Photography
Lot more testimonials on the website. More info here.
Yours in Creative Photography,
Bob