

Clarity, Dehaze and Grain effects in Lightroom and Camera Raw are my go-to tools. Now they are available as adjustment layers in Photoshop.
New adjustment layers
Clarity and Dehaze, and Grain bring powerful non-destructive, maskable, layer-based adjustments directly into Photoshop, making it easier to precisely refine texture, depth, and detail. Let’s take a closer look…
Clarity and Dehaze
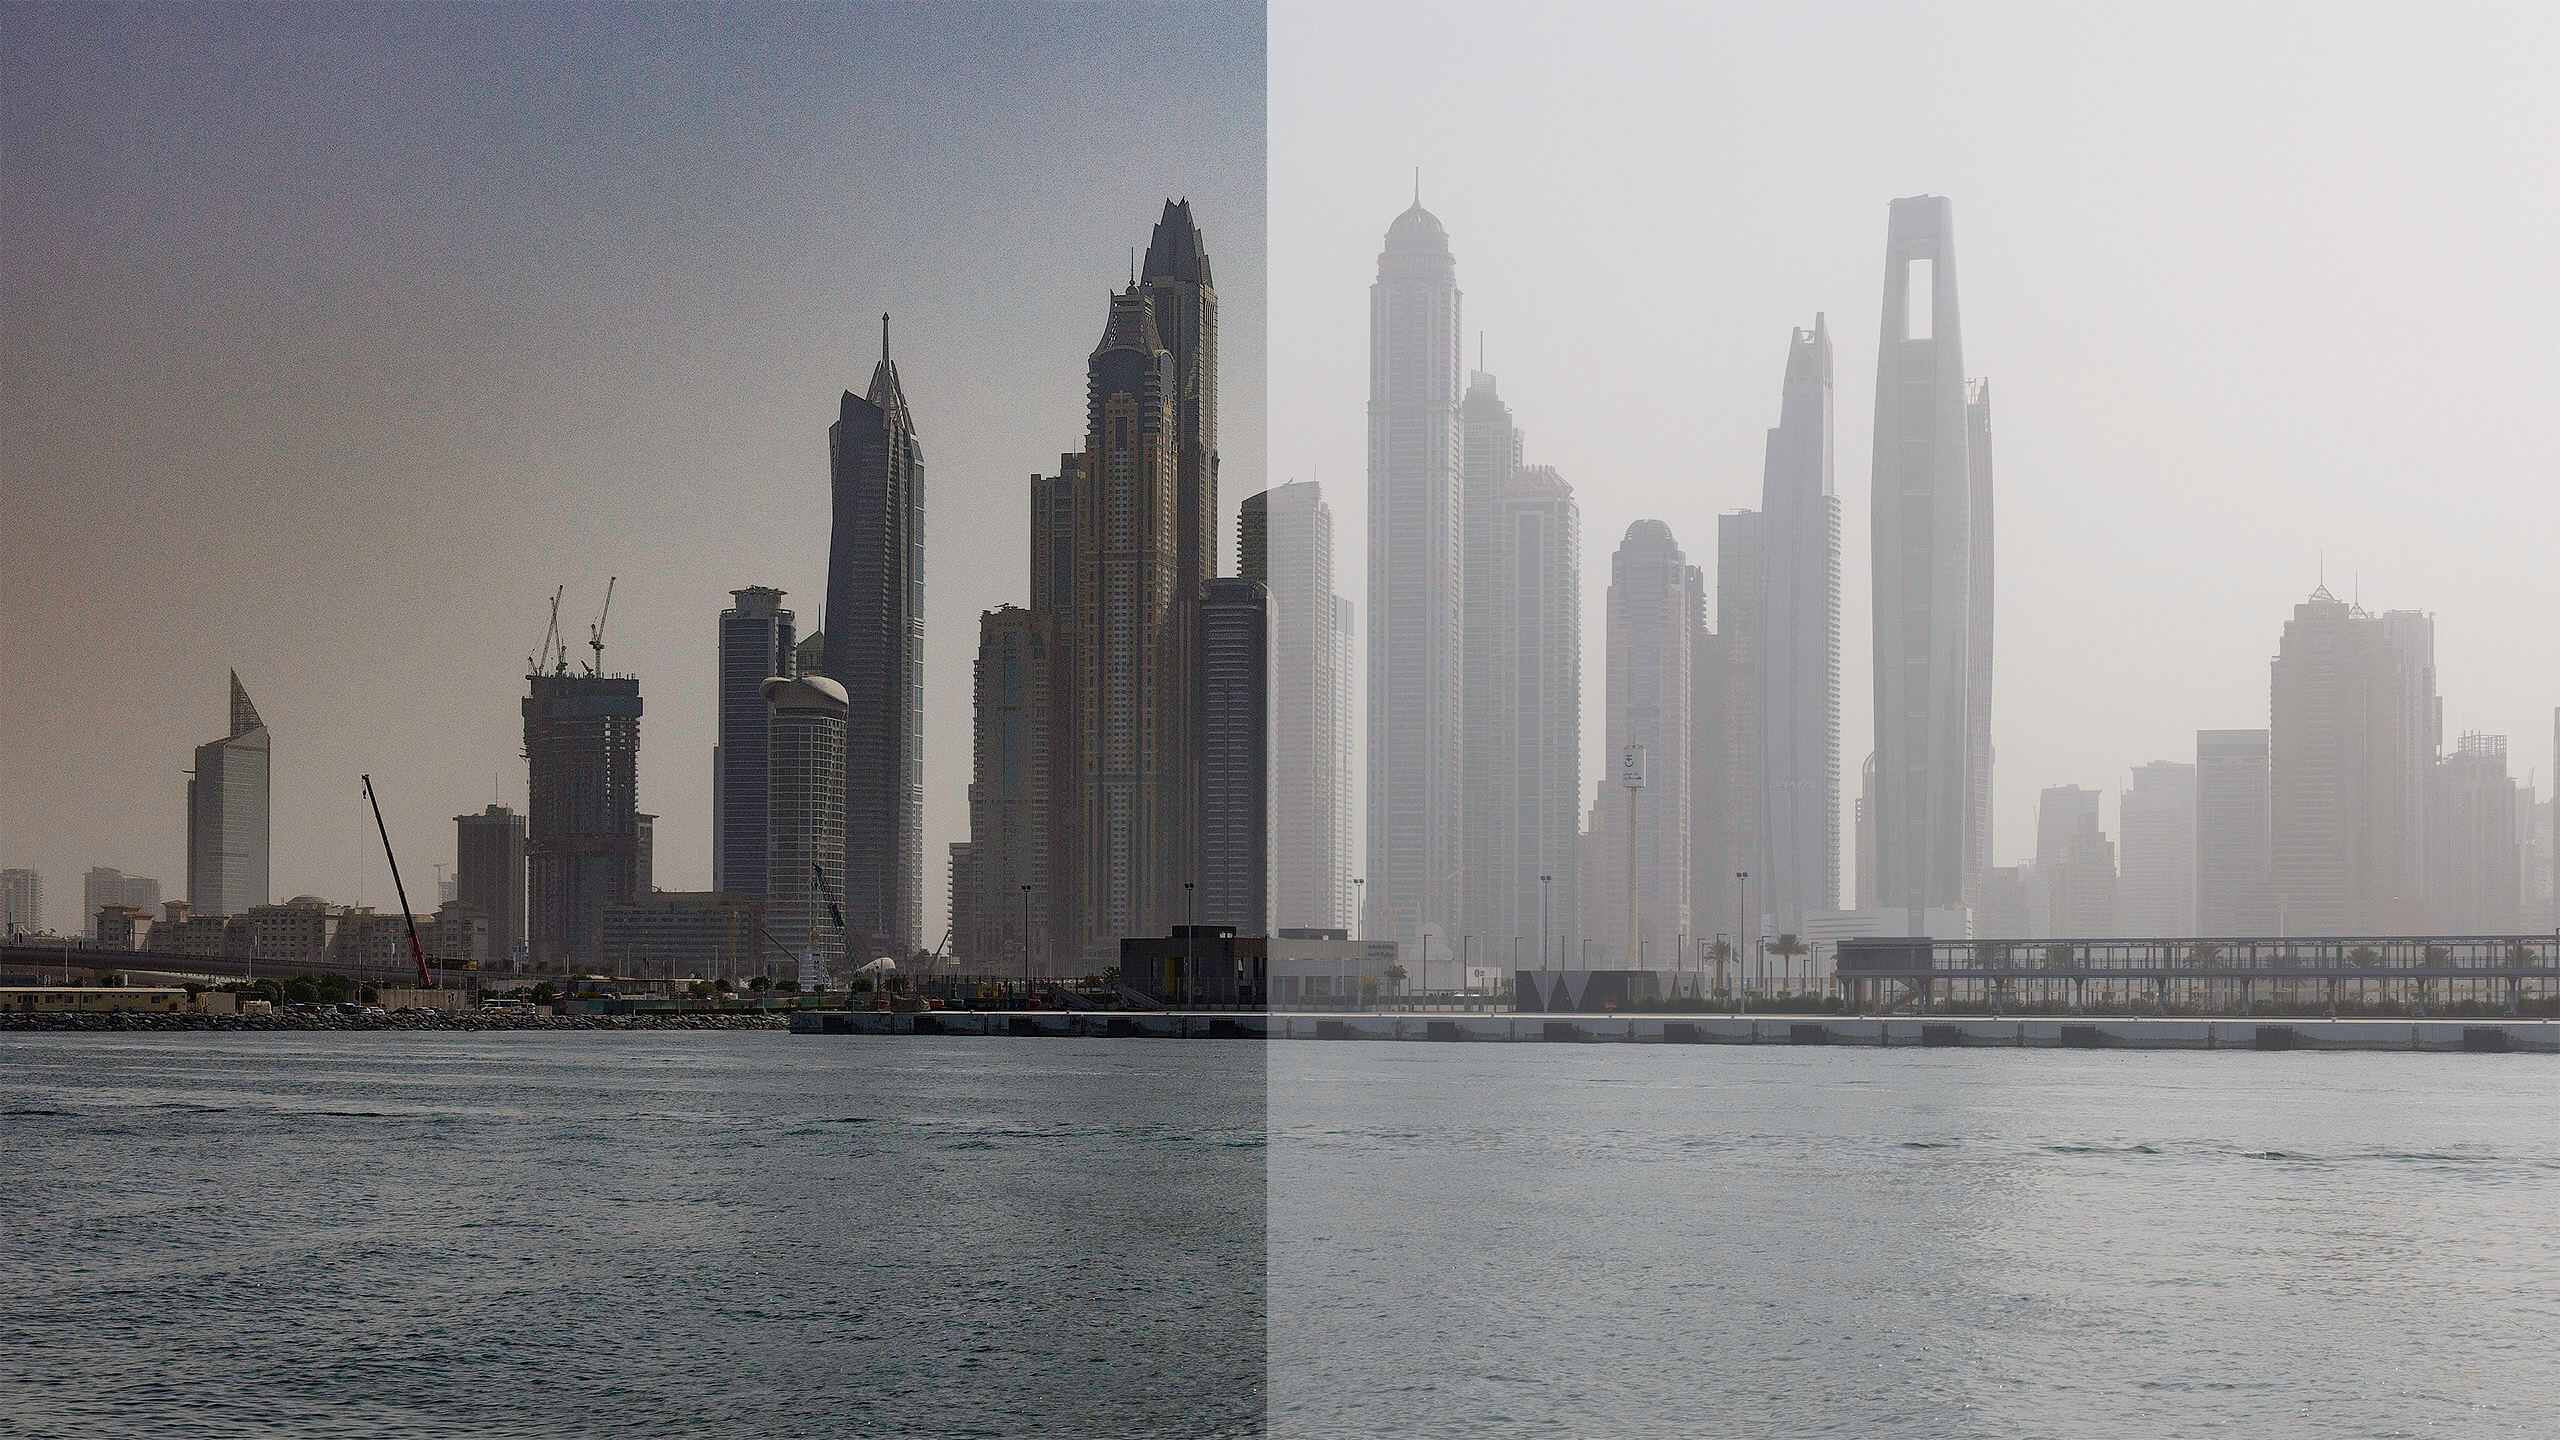
Photoshop combines these two effect into a single adjustment layer. That means it’s maskable and works with all of the blending modes. This is powerful. Dehaze cuts through atmospheric haze easily. Clarity enhances a subject’s structure and crispness.

Adding a Clarity and Dehaze adjustment layer cuts through the atmospheric issues caused by humidity and particles in the air.


Grain
The Grain adjustment layer has three sliders — amount, size and roughness. Grain can be added for creative purposes and for making our super resolution digital captures look more like a photo made on film. I’ve found that grain wants to be added after all the other work is finished included sizing to the output dimensions.

These new adjustment layers bring even more flexibility to the world’s best digital image finishing tool, Photoshop. These layers are generally available in the current version.