


Windows 11 is a powerful operating system, and it offers quite a lot of flexibility when it comes to adjusting power profiles and optimizing a given system’s performance-to-efficiency ratio. There are several ways in which this can be achieved, ranging from simply toggling on or off Windows’ Energy Saver mode, to deep-diving into the Registry Editor and tinkering with various low-level system behaviors.
However, there’s one user-facing feature built into the core of Windows in particular that can demonstrably increase any PC’s battery stamina, and it’s entirely free and incredibly intuitive to configure. Known aptly as Power Mode, this utility is buried within the Settings app page, and it allows for on-the-fly switching between various pre-configured power profile modes.
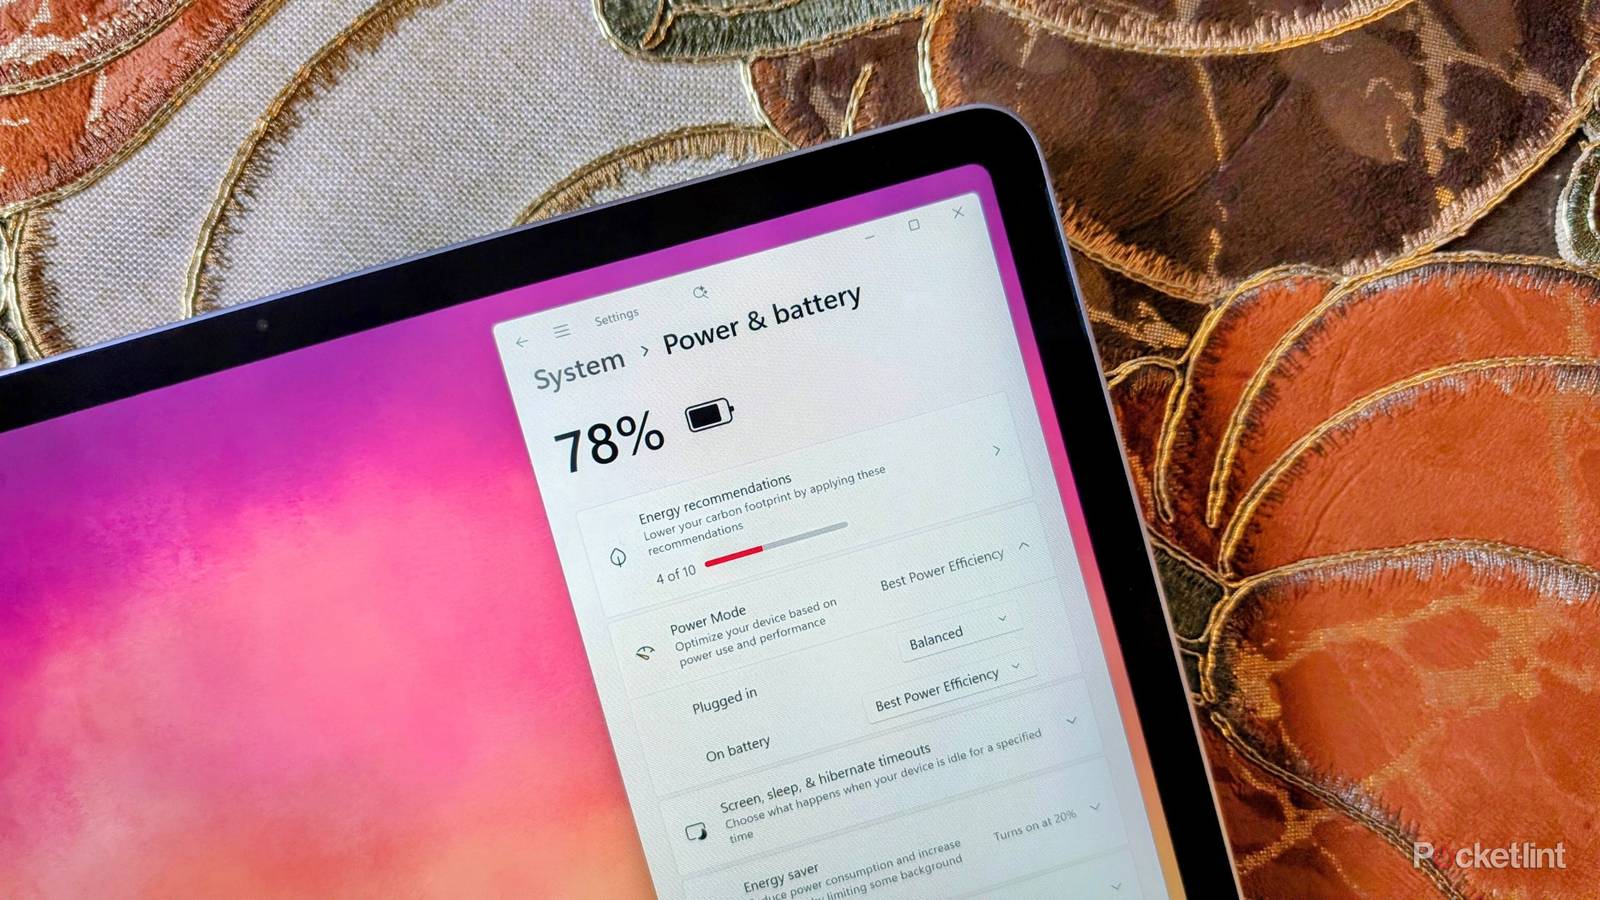
In computing, a power profile refers to a set of configuration settings that help to balance performance and battery life. Some power profiles maximize performance at the expense of endurance, and vice versa.
Back in the Windows 10 days, these power profiles were easily accessible via the System Tray battery flyout, but discoverability of the feature has taken a hit now that it’s obfuscated away from the main desktop interface starting in Windows 11. Thankfully, it’s still fairly easy to jump into Settings to swap your Power Mode — you just need to know where to look.
If you’d like to bring back Windows 10’s easy taskbar access to Power Mode profiles, consider downloading the third-party Battery Flyout app from the Microsoft Store. This tool costs a couple of dollars, but it’s free of bloat, it fits in with the Windows 11 design language, and it ports over missing battery management functions.
How to adjust Power Mode profiles on Windows 11
The feature is located within the Power & battery section of Settings

To swap between preconfigured Power Mode profiles on your Windows 11 laptop or tablet PC, follow these steps:
- Launch the Settings application.
- Navigate to System > Power & battery > Power Mode.
- Click or tap on the dropdown menu located next to On battery.
- From here, select from the available options (Best Power Efficiency, Balanced, and Best Performance).
And, just like that, you can alternate between better battery life and better performance with the click of a button, and the process doesn’t require a Windows restart or anything else of that nature.
Note that some third-party OEMs also ship their computers with dedicated software for managing system performance and battery life — this is especially common when it comes to gaming PCs. Be sure to also adjust in-app power saving settings accordingly.
Out of the box, hardware makers can configure their PCs to default to whichever power profile they see fit. Most laptops running Windows 11 ship with their On battery Power Mode set to Balanced by default, but individual mileage may vary. My Surface Pro 12-inch, for example, was set to Best Power Efficiency when I set it up for the first time.
For the most part, I’d recommend setting the average battery-powered PC to either Balanced or Best Power Efficiecy, which is performant enough for general-purpose productivity. If you want your computer to run on all cylinders, of course, then Best Performance is the preset to select, though it’ll come at the cost of some endurance.