


Across the iPhone, the iPad, the Mac, and beyond, Control Center serves as the primary drop-down UI surface for accessing and toggling various system-related quick settings. Starting with the release of macOS 26 Tahoe in 2025, Apple dramatically improved the flexibility of the Mac’s Control Center in particular, bringing it much more in line with its mobile OS counterparts from a customization perspective.
For the most part, the Mac’s post-macOS 26 Control Center is a major improvement over its immediate predecessor, offering a ton of tweaks and shortcuts at its disposal. With this in mind, there are a few quick settings tiles in particular that I now always leverage across both my MacBook and my iMac, each of which adds convenience to my daily computing flow.
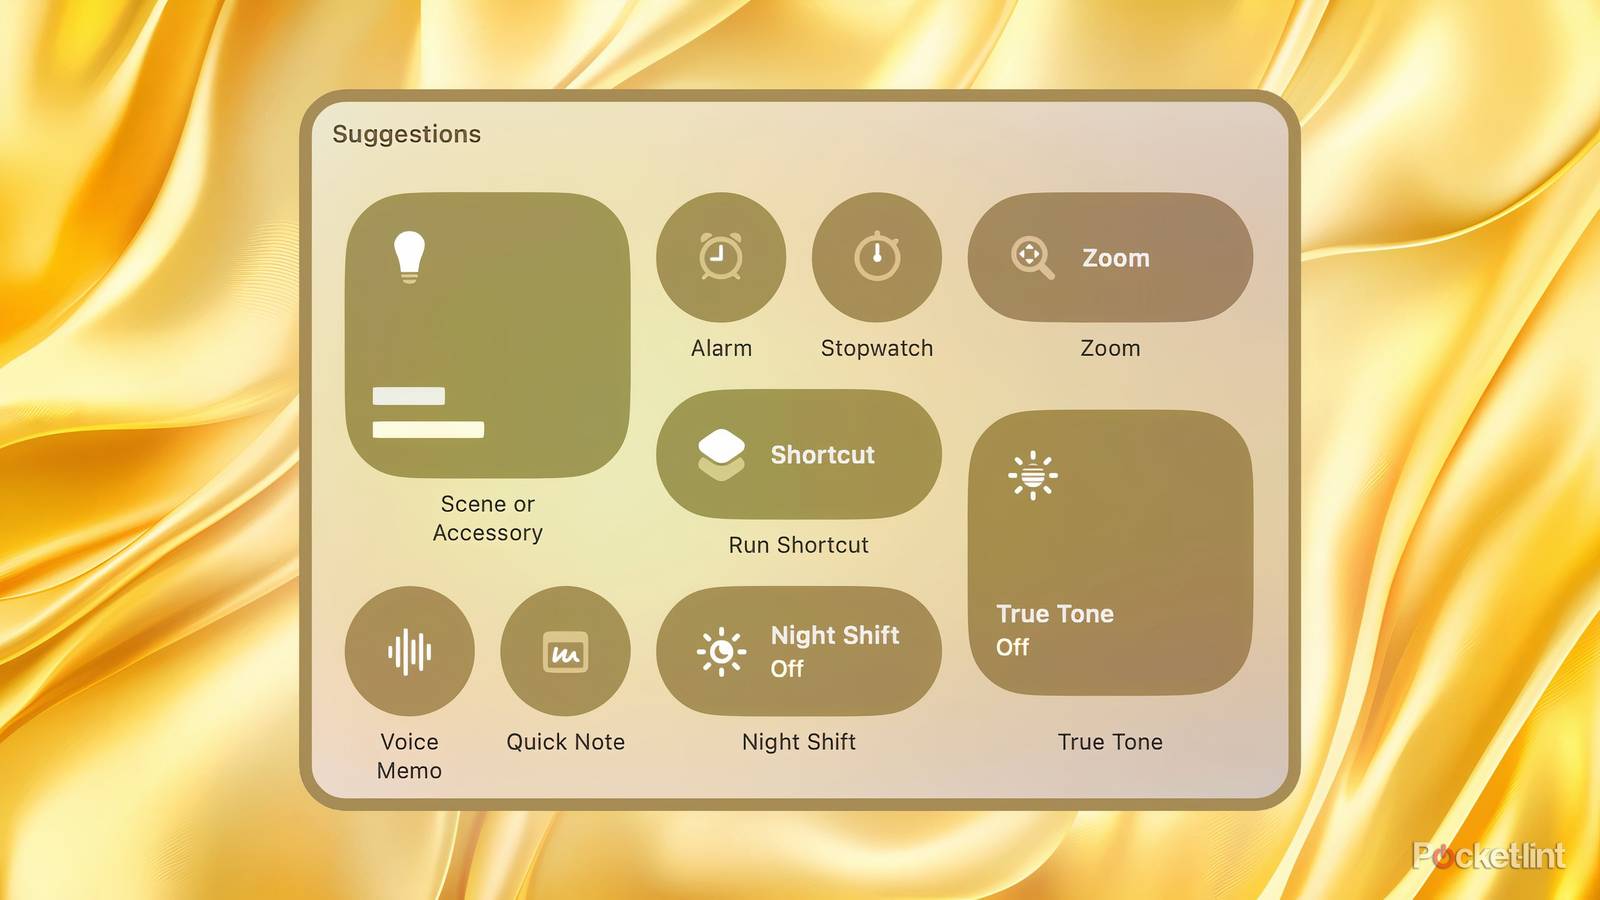
Here are six useful functions that macOS 26 Tahoe’s Control Center brings to the table through its selection of bespoke and pinnable quick settings tiles.
It can snap your windows for you
Via Desktop & Finder > Tile Windows Left & Right

There are a number of ways to snap individual application windows to different sections or corners of your screen on macOS, ranging from keyboard shortcuts to Windows Snap-style manipulations. Lessser known if the ability to tile windows by clicking on a dedicated quick settings tile within Control Center. The Left & Right tile is arguably the most useful, splitting your two most recently used windows into a perfect 50:50 ratio, but there are also options for a quadruple tile layout and a triple tile layout.
It can trigger your screen saver for you
Via Lock Screen > Start Screen Saver

I love a good screen saver, so much so that I recently splurged $20 on a particularly well-crafted one for my iMac. In the past, I’ve relied on hot corners (with modifier keys) to trigger screen saver mode on the fly, without having to rely on not interacting with my computer to initiate the feature. These days, with the power of macOS 26’s Control Center, I simply hit the Screen Saver quick setting tile and the rest immediately takes care of itself.
It can launch your print queue for you
Via Utilities > Print Center

Print Center is a useful part of macOS that displays and allows you to manage all ongoing printer operations. This queue-like interface can come in handy when dealing with a larger-than-average print job, or when troubleshooting those all-too-familiar cases of having a printer act up. Sure, it’s easy enough to search for Print Center via Spotlight Search, but having a dedicated Control Center tile for the feature is even nicer — it’s just too bad the queue doesn’t expand in-line through a dedicated flyout interface.
It can surface your shortcuts for you

Apple’s first-party Shortcuts application for macOS is a powerful utility for automating tasks, for assembling ‘if / then’ scenarios, and for streamlining power user workflows. The Show ‘Menu Bar’ Collection quick setting tile within Control Center certainly comes in handy, as it triggers a small Shortcuts launcher when clicked on. If you configure the feature properly, you can set it up to surface everthing from changing video playback speeds, to toggling smart light fixtures, to running a network speed test, and much more all entriely on the fly.
It can switch on background noises for you
Via Hearing Accessibility > Background Sounds

There are some excellent third-party applications available for macOS that are designed to instill a sense of calm, to promote restfulness, and to enhance focus. Some of my favorite options that I’ve written about in the past include Portal and Dark Noise, but macOS does include its own limited set of white noise options right out of the box, too. Known as Background Sounds, setting up the feature’s associated Control Center tile makes it easy to jump between rain sounds, a crackling fire, and more, along with some advanced options to play around with.
It can streamline the screen snipping process for you
Via Screenshot > Custom Capture

I screenshot various parts of my desktop on a daily basis for work, and so having quick access to screenshotting tools on my operating system is a must. macOS’s keyboard shortcuts make the process quick and convenient, with cmd + shift + 5 surfacing the toolbar for more advanced options. Within Control Center, I can set up a dedicated Custom Capture profile, which allows me to adjust parameters like save destination, capture type, timer length, and more without impacting other screenshots taken via keyboard shortcuts. Likewise, a separate Custom Recording quick settings tile can also be set up, which is a nice-to-have addition.